Saturday, January 10, 2015

Healthy Comfort Foods for Game Day (21 Day Fix Approved)


It's Game Day for the Patriots and Ravens! I hate, hate, HATE bye weeks! After waiting for two weeks for a Patriots' game, I am very excited to watch the game this afternoon. Big games are only made better with good foods. The game is bound to make me stressed, excited, happy, sad, discouraged, angry, etc and with those emotions comes eating (even though I am working through this problem...).

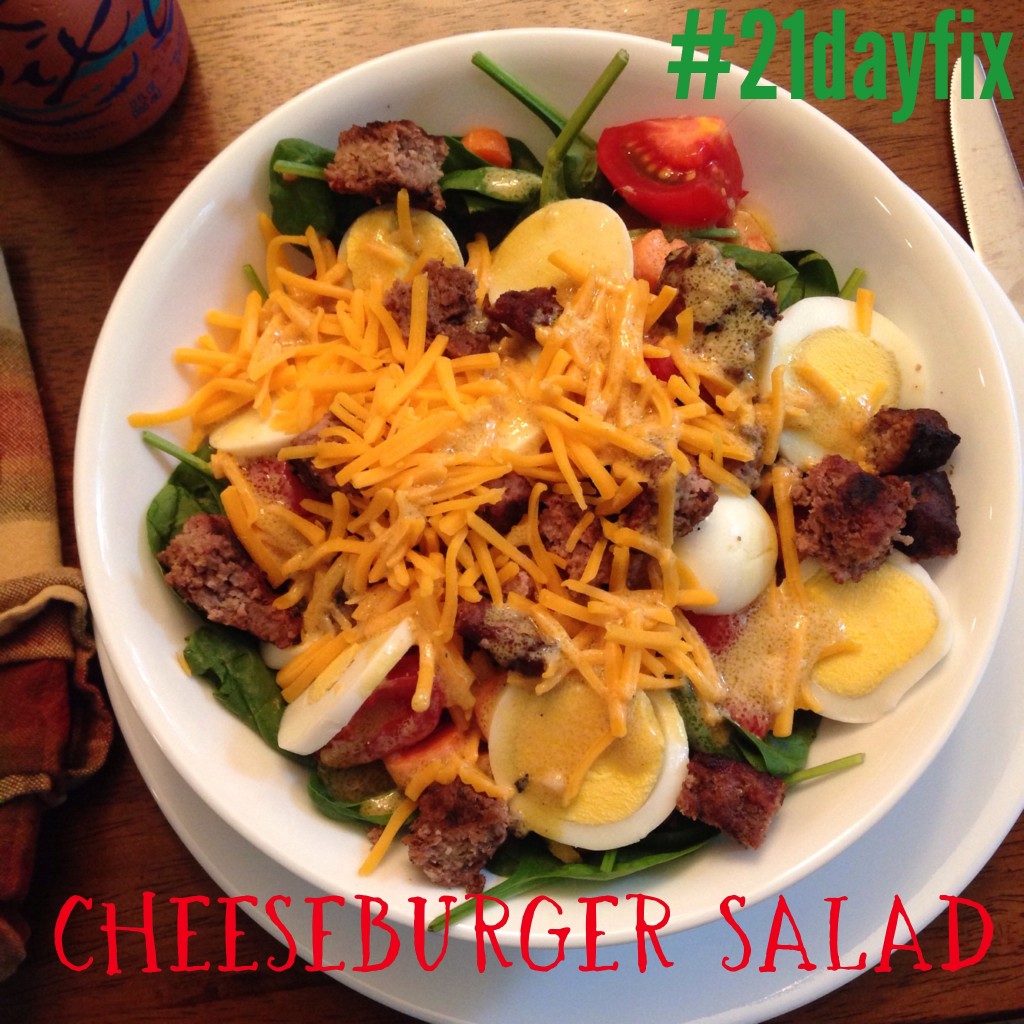
Instead of reaching for a bag of chips or piece of pizza from the local pizza shop, I want to be proactive and create guilt free comfort foods. Some of the possibilities for today include: quinoa pizza bites, almond crusted chicken tenders, cheeseburger salad, and cauliflower crust pizza.

image (5)

Almond Crusted Chicken Tenders

Mini Cauliflower Pizza Crusts


As always MODERATION is key! Enjoy your guilt free eating and please share what you plan on eating during the NFL and College playoffs.

Saturday, January 3, 2015

Making 21 Day Fix Easier With Shared Cheat Sheets

Every time I find a cheat sheet for 21 Day Fix I pin it on my 21 Day Fix board on Pinterest. Then I am constantly searching through my pins to find the cheat sheets as a reference for my challenge group participants. I am creating this post to help you easily find these cheat sheets. Some of these materials are mine, but most are borrowed from other 21 Day Fixers and I appreciate their generosity in sharing their creations. Please use these items to help you find success in your 21 Day Fix journey!

This first image is helpful to use if you plan to do more than one round of 21 Day Fix. You will quickly find that there isn't enough space in the booklet to write down multiple rounds of the program.

This image is one way you can count your containers. Just make sure you are using the correct number of containers for the amount of calories you calculate for yourself.

Didn't have time to clean your containers...no worries. This image shows you the serving size of each container.

This image shows you which foods you can put into each container.

Vegan or vegetarian...check out this list.
The workout schedule may seem a little overwhelming at first, but after Week 1 you will know exactly what you are doing!

Not sure what to buy...use this list to help you choose what to purchase at the grocery store!

Below you will find links to a chart created by Lauren during her first round of 21 Day Fix and the link to my Meal Plan (please make a copy of each before making changes!)


Tuesday, December 30, 2014

Setting scary 2015 fitness goals...


In one day we will be ringing in 2015 and I have set myself up for some scary fitness goals. Beginning January 1 I will be running at least 5.5 miles per day in order to complete 2,015 miles in 2015. Yes, that means I need to run EVERY. SINGLE. DAY. and yes, that is a lot of miles, but I am excited and incredibly nervous. Signing up for a goal that lasts 365 days is daunting, but I am ready for the challenge. I am hoping to run two half marathons this year, which will help to get two days of running done in one day, so I'll earn myself a rest day :).


Interested in signing up to run 2,015 miles, check out the Run the Edge site for more information. You can run it solo, with a partner, or with a team of 3. What better way to get moving...grab a friend or 2 and get out there!

My other scary fitness goal isn't nearly as daunting, but beginning the first full week in January I will be starting Insanity Max: 30. I have heard incredible reports from test group participants with this workout! I love that I can get a good butt kicking in just 30 minutes in my own living room. I plan to incorporate what I have learned about nutrition through 21 Day Fix into this program.


30 minutes. INSANE results.

Will I be able to run 5.5 miles per day plus complete 60 days Insanity Max:30? Stay tuned for updates...

Sunday, November 2, 2014

Crock pot butternut squash soup

This afternoon I threw together a slow cook butternut squash soup recipe that I found on Pinterest. It was incredibly easy to put together. My 4-year-old helped me put it all together so I did not follow the recipe exactly as written, but it still came out great.

Recipe changes:
  • I didn't like the idea of adding half and half to the soup so I used almond milk instead.
  • I also used coconut oil instead of butter.
  • The directions want you to add only half of the chicken broth in the beginning and hold off on the half and half until the end. I did not see this direction because I was trying to help my son and we put everything in at once. 
  • I also add a drizzle of real maple syrup to each bowl.
It's a nice clean soup that I plan on having with my lunch most of this week. 

Enjoy!


Creative Birthday Cooking

As a working mom I always promised myself that I would do two things for my children, make their Halloween costumes and create fun treats for their birthdays and other holidays. In the middle of October my oldest son turned 4. We had a handful of birthday celebrations (one for friends, one for my family, one for at preschool, and one for my husband's family), which means I had to (wanted to) create 4 different treats.

He wanted a superhero theme for his birthday party with his friends. For this party I made a gluten free funfetti cake with Spider-Man decor.  I found a great tutorial on Pinterest on how to easily recreate pictures that made this creation super simple.
Cake decorating instructions.


For his birthday party with my family he wanted monster whoopee pies, so I created gluten free monster whoopee pies. 


His school treat did not need to be gluten free so I made pudding graveyards. The original recipe called for pre-made pudding cups, but buying 30 of those would be pricey so I bought 2 packages of chocolate pudding and small clear plastic cups to cut the price.


For the final birthday party I was caked out so I made candy corn cheesecake mousse. It was simple and delicious. (The recipe called for cool whip and I'm not a fan, so I used heavy whipping cream instead.)


The celebrating and creating was fun while it lasted, but I'm glad I'm done birthday celebrations for now. Instead I'll be working on fun holiday creations!


Monday, August 18, 2014

An attempt at #moveoftheday

I am a follower of many fitness professionals on Instagram and Facebook. Many of them post #moveoftheday video clips for their followers to try. I thought that it might do me some good to give their moves a try. I am hoping to try two new moves per day.


The thought crossed my mind that it might be quite comical to video myself attempting these moves. Not only would I get a good laugh, but I would also get to see how my form was. (I found out that my plank form is awful, but at least now I know what I need to do to improve.)

Included in the clip are moves that I found from following Chalene Johnson on Facebook and fitandfunky on Instagram.


The first move was part of a 2 minute plank core challenge From Chalene Johnson...holy cow was that hard! That is followed by two much easier ab moves from fitandfunky, but were still hard on the core. It probably would have been even more difficult if I had actually had good form! The final exercise is shown from two different angles. I will say that when I first put my feet on the wall it felt WAY higher than where I actually was. Holding yourself up against the wall like that while trying to do movement with your legs is a really great whole body workout!

I wouldn't recommend trying to copy what I am doing in this video. If you are looking for a challenge and a way to mix up your workouts, I recommend trying out different moves of the day by watching people who know what they are doing! If you are on Instagram, look for #moveoftheday. If you try out a move, share it with me to try @amarshnh.


Thursday, August 14, 2014

Creating gluten free deliciousness using a hand-me-down cook book!

I have always loved to bake, but when I was diagnosed with Celiac baking became a challenge. Now I love to take the challenge head on! When baking gluten free goodies I tend to stress throughout the process. I can't help but wonder if it the finished product will be edible, tasty, and presentable. Having to throw away gluten free baked goods because they didn't bake well is incredibly upsetting when you take into consideration the cost of the products going into the mixing bowl.

In the beginning I searched specifically for gluten free recipes and was upset with the thought that I wouldn't be able to make my family recipes anymore. After some time and experimentation, my mom, aunt, and I were able to find ways to adapt our family recipes into gluten free deliciousness! Now when I bake I NEVER look for gluten free recipes. I look for recipes that I like and give it a try. 

Yesterday seemed like a fall day dropped right in the middle of August, so I took advantage of the cool rainy day and made two batches of muffins, blueberry and cranberry, using my favorite cook book. After my husband's grandmother died we were cleaning out her house and she had a ton of cook books. I love cook books and while flipping through her selection I found this beauty!


This edition was printed in 1949. I LOVE opening it and seeing his grandmother's handwritten recipes on the inside! I have transitioned many of the recipes in this book into gluten free goodies with a lot of success, including the muffins from yesterday.
Displaying photo.JPG
Continue reading this post for the recipe!
The only thing I changed from the original recipe was the use of gluten free flour. I use Bob's Red Mill Gluten Free All Purpose Baking Flour. I also add a teaspoon of xanthan gum and a teaspoon of pectin (we have found that adding the pectin allows the goods to not spoil so quickly). I use almond milk instead of cow's milk and like to let the eggs and milk sit out for a bit so that they are warmer than refrigerator temperature. (I'm not sure of the science behind this, but for whatever reason it seems to make better baked goods!)

You will find when baking with gluten free products that pouring the batter is difficult. Between the thickness of the batter and the frozen berries that I used I had to use a cookie dough scoop to get the batter neatly into the muffin tins. WARNING: Do not eat the raw batter! Not because of the raw egg, but because for whatever reason gluten free batter tastes awful. I do not what kind of magic happens in the oven, but thankfully it comes out as gluten free deliciousness!

The finished product!

Thankfully, there are a lot of people living in my house so I won't be eating the 24 muffins alone. They received rave reviews from the consumers, but I don't think any member of my family would complain too much about receiving fresh out of the oven muffins!

The recipe as written in the book:

Rich Blueberry Muffins
  1. 1 cup blueberries
  2. 1/4 cup butter or other shortening
  3. 1 3/4 cups flour
  4. 2 1/2 teaspoons baking powder
  5. 1/4 teaspoon salt
  6. 1/2 cup sugar
  7. 1 egg
  8. 1/2 cup milk
Wash the blueberries and drain on absorbent paper. Place the fat in a mixing bowl; set in a warm place to soften (it may be melted, but should not be hot) while preparing the pans and measuring the other ingredients. Sift the flour, baking powder, salt, and sugar together into the bowl with the fat. Add the unbeaten egg and the milk; beat until smooth. Stir in the drained blueberries. Pour into greased muffin tins; sprinkle generously with additional granulated sugar. Bake in a moderate oven (375 to 400) for 20 to 25 minutes.

Enjoy!